带有圆形中间按钮的弯曲选项卡— Swift

标签栏是iOS应用程序设计中必不可少的组件,也是最常用的功能之一。 它提供了轻松的导航并增强了外观。
通过定制的时尚设计增强Tab栏,可以立即使您的应用脱颖而出。
设置故事板…
我假设您已经创建了新的iOS项目。 在我们开始之前,只需设置您的视图控制器。
- 将一个TabBarController添加到您的Storyboard中。
- 添加3或5个ViewController并将它们链接到TabBarController
创建一个新类MyTabBarCtrl.swift
 导入UIKit
  class MyTabBarCtrl:UITabBarController,UITabBarControllerDelegate {
 所需的init(coder aDecoder:NSCoder){
  super.init(coder:aDecoder)!
  }

 覆盖func viewDidLoad(){
  super.viewDidLoad()
  self.delegate =自我
  }
  }
返回情节提要 ,然后将TabBarController类更改为MyTabBarCtrl。
绘制TabBar形状
我们需要子类化TabBar。 创建一个新类MyTabBar.swift
 导入UIKit
  @IBDesignable
 类MyTabBar:UITabBar {

  }
形状层的灵感来自本文。 将以下内容添加到MyTabBar类。
 私人var shapeLayer:CALayer?
 私人功能addShape(){
 让shapeLayer = CAShapeLayer()
  shapeLayer.path = createPath()
  shapeLayer.strokeColor = UIColor.lightGray.cgColor
  shapeLayer.fillColor = UIColor.white.cgColor
  shapeLayer.lineWidth = 1.0

  //下面的4行是条形上方的阴影。 如果您不希望有阴影,可以跳过它们
  shapeLayer.shadowOffset = CGSize(宽度:0,高度:0)
  shapeLayer.shadowRadius = 10
  shapeLayer.shadowColor = UIColor.gray.cgColor
  shapeLayer.shadowOpacity = 0.3

 如果让oldShapeLayer = self.shapeLayer {
  self.layer.replaceSublayer(oldShapeLayer,with:shapeLayer)
  }其他{
  self.layer.insertSublayer(shapeLayer,at:0)
  }
  self.shapeLayer = shapeLayer
  }
 覆盖func draw(_ rect:CGRect){
  self.addShape()
  }
  func createPath()-> CGPath {
 身高:CGFloat = 37.0
 让路径= UIBezierPath()
 让centerWidth = self.frame.width / 2
  path.move(to:CGPoint(x:0,y:0))//从左上角开始
  path.addLine(to:CGPoint(x:(centerWidth-height * 2),y:0))//槽的起点

  path.addCurve(至:CGPoint(x:centerWidth,y:height),
  controlPoint1:CGPoint(x:(centerWidth-30),y:0),controlPoint2:CGPoint(x:centerWidth-35,y:height))

  path.addCurve(至:CGPoint(x:(centerWidth + height * 2),y:0),
  controlPoint1:CGPoint(x:centerWidth + 35,y:height),controlPoint2:CGPoint(x:(centerWidth + 30),y:0))

  path.addLine(至:CGPoint(x:self.frame.width,y:0))
  path.addLine(至:CGPoint(x:self.frame.width,y:self.frame.height))
  path.addLine(至:CGPoint(x:0,y:self.frame.height))
  path.close()

 返回path.cgPath
  }
这就是形状!
但是有一个小问题。 中间按钮的位置超出TabBar视图的边界。 默认情况下,在其超级视图范围之外的视图上不会捕获单击事件。 为了解决这个问题,我们重写了hitTest:withEvent:方法。 在同一MyTabBar类中添加thin
 覆盖func hitTest(_ point:CGPoint,事件:UIEvent?)-> UIView?  {
 警卫!clipsToBounds &&!isHidden && alpha> 0 else {return nil}
 适用于subviews.reversed(){
 让subPoint = member.convert(point,from:self)
 守卫let result = member.hitTest(subPoint,with:event)else {继续}
 返回结果
  }
 返回零
  }
回到您的故事板。 选择MyTabBarCtrl下的TabBar对象。 在“身份检查器”下,选择“ MyTabBar”,
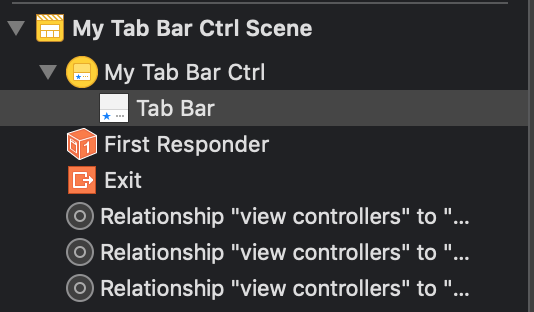
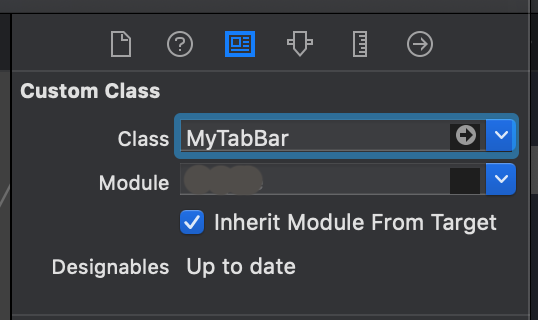
标签栏的形状现在应该在情节提要中的视图控制器中可见。
设计中间按钮
打开MyTabBarCtrl.swift并添加此功能
  // TabBarButton –设置中间按钮
  func setupMiddleButton(){

 让middleBtn = UIButton(frame:CGRect(x:(self.view.bounds.width / 2)-25,y:-20,width:50,height:50))

  //用自己的方式设置按钮
  middleBtn.setIcon(icon:.fontAwesomeSolid(.home),iconSize:20.0,color:UIColor.white,backgroundColor:UIColor.white,forState:.normal)
  middleBtn.applyGradient(colors:colorBlueDark.cgColor,colorBlueLight.cgColor])

  //添加到标签栏并添加click事件
  self.tabBar.addSubview(middleBtn)
  middleBtn.addTarget(self,action:#selector(self.menuButtonAction),用于:.touchUpInside)

  self.view.layoutIfNeeded()
  }

  //菜单按钮触摸动作
  @objc func menuButtonAction(sender:UIButton){
  self.selectedIndex = 2 //选择中间的标签。 如果只有3个标签,请使用“ 1”。
  }
对于setIcon,我使用了这个库。
有关按钮渐变,请查看本教程。
在TabBarController的viewDidLoad()中调用此函数。
就这样!